|
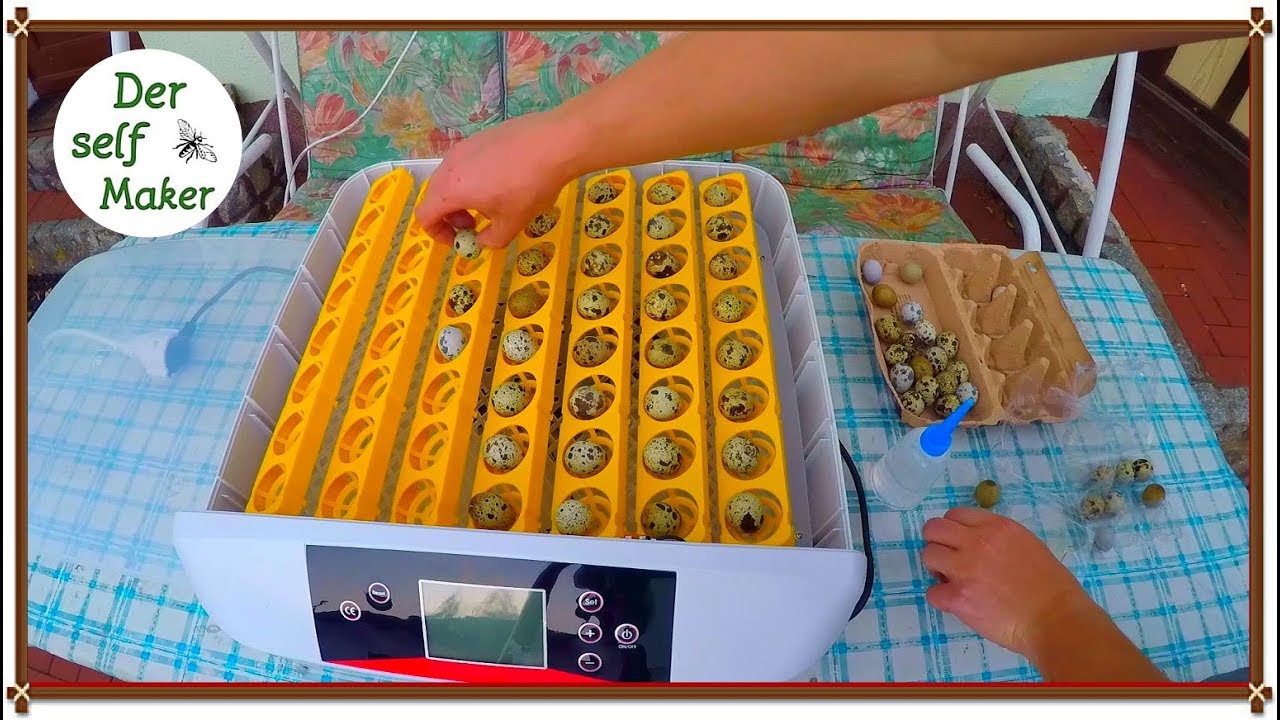
In the never ending search for best practice and efficiency poultry farmers have used many different techniques in order to mimic the way nature cares for animals, not all have been successful. One area where a high level of success is achievable is in poultry incubation and hatching eggs using an artificial incubator. ™ Egg Incubators are used to copy the characteristics of a live chicken In order to best care for the egg in the incubation stage and also when the egg first hatches. There are a huge variety of incubators available and generally speaking the more they cost the better care they will take of the eggs. For example a hen will turn her eggs twice every day with the exception of the last three days, this is to ensure the developing chick is allowed to grow properly and without this care will undoubtedly die or be born deformed. As you can imagine being available to turn the eggs twice a day for twenty days is quite a commitment so many incubators will come with a self turning feature and I kuluçka makinesi would highly recommend spending the extra money on one with this function. Incubators can come with timers and settings which allow the user to program it to be used for different breeds and species. Foe example a chicken egg has a different gestation period to a goose or a turkey egg so if you are looking to incubate more than one specific species then this is another important function to look out for! Nothing will ever be able to perfectly match the wonders of mother nature but with care and attention and the help of some proper equipment we can certainly enjoy a huge amount of success when in comes to incubating poultry and hatching eggs. When you consider how to make egg incubator, you must consider all the things that an incubator has to do. Here's a short list of bullets to consider when making an egg incubator. -Temperature Control Your homemade incubator must be able to maintain a steady temperature appropriate to the species you are trying to hatch. The incubation area must be in an area that is free from direct sunlight and drafts. The temperature control doesn't matter, as long as it can be adjusted in increments. A thermometer should be present in the enclosed area to measure and maintain the appropriate level of heat. -Humidity Control Your homemade incubator must be able to maintain a steady humidity level, appropriate to the species you are trying to hatch. An easy way to accomplish this by building in plans for a pan of water to be placed under the incubator to raise humidity, and vents or slots in the incubator to lower humidity, as needed. -Turning Mechanism If you aren't able to build an automatic turning mechanism into your design, you have to ensure that the enclosed area is not sealed, that is, it can be opened easily in order to access the eggs quickly to turn them, without significant change in heat or humidity. -Flooring The base of your incubator needs to be a material that is easily removable, or easily cleaned. Also, the flooring should not be made of certain materials, as they may be poisonous to the species being raised. Cedar chips, for example, are poisonous to quail and should never be used as flooring. For more information about egg incubation, including chicken egg incubators, DIY egg incubator projects, and all other things related to incubator use and maintenance, check out my blog at Chicken Egg Incubators which is full of incubation information.
0 Comments
Leave a Reply. |
 RSS Feed
